Tools
Okay, do you have your parchment? Check. Do you have your inks? Check. That means we’re ready to write!
Wait…we might be missing a few things. What are we going to write with? Where are we putting the ink so it doesn’t dribble down our desk? What else might we need as we go along? Can I erase things if I make a mistake?
Great questions!
Pen
Let’s start with your pen. You can’t go to the local market and just pick one up, so you (once again) are stuck with making your own. This means you’ll need to find a feather of the appropriate size. If it’s a fresh feather, it will need to be hardened, which can be done by leaving it for weeks or months to dry out or you can soak them in water and dry them out with hot sands. (Sometimes the feathery portions of the quill were removed to make it easier to handle while writing.)
Next, you’ll need to scrape away the outer layer of the bottom of the feather, which will leave you with a tube-like end. Use a penknife to pare it down to a slight nib shape (see the link for an example) and then cut a slit through the center of the long side. This will allow the ink to be drawn into the nib point, so you can write. Finish by shaping the pen’s end so it is appropriate for the type of script you will be writing.
Heritage Hawks has a wonderful step-by-step guide to making pens with detailed drawings to go along with the steps. Check it out here.
(The video should begin about 2:02 minutes in.)
Seamus Heaney translated the hardships endured by a scribe from the 1000s who wrote the following about working with his quill:
Colmcille the Scribe
My hand is cramped from penwork.
My quill has a tapered point.
Its bird-mouth issues a blue-dark
Beetle-spark of ink.Wisdom keeps welling in streams
From my fine-drawn, sallow hand:
Riverrun on the vellum
of ink from green-skinned holly.My small runny pen keeps going
Through books, through thick and thin
To enrich the scholars’ holdings:
penwork that cramps my hand.
Knife

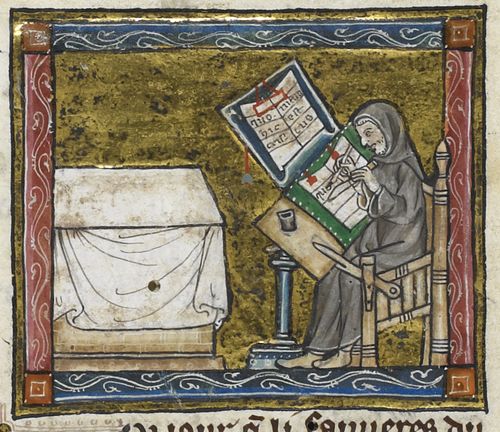
Hermit using penknife to steady parchment while writing. Detail of a miniature of a hermit at work on a manuscript, from the Estoire del Saint Graal, France (Saint-Omer or Tournai?), c. 1315 – 1325, Royal MS 14 E III, f. 6v
Did you catch the important tool used to shape the pen? This tool is called a penknife, and it is often seen in illuminated scenes of scribes at work. Check out some examples here and see if you can spot all of the penknives.
These knives were not only used to shape quills, however. They were used so often, because they had many additional uses, such as scraping away the parchment where an error had been made and using the tip of the knife to hold a page steady while writing (so as to avoid smudging the page with your hand or causing extra movement and errors).
Ink Pots
As you can also see in the image to the right, the scribe would also keep at least one ink pot on or near his desk while writing. The scribe in the image at this link has two pots: one for black ink and one for red. Some images instead show ink pots on a separate stand near the desk, as a sort of precaution to avoid tipping the ink over onto the parchment. In later medieval images, the ink pots were often shown in metal hoops attached to the side of the desk, but sometimes as ink wells that were carved into the desk or were placed in a holding spot in the desk instead.
Ink holders were usually made from materials that could be found in the area. Some areas near waterways used seashells to hold ink. Others created stoneware to hold the ink or used carved horn to hold ink.
I want to know more
- “The Medieval Scribe and the Art of Writing” from The Ultimate History Project
- “Scribal Errors and Corrections” from Medieval Writing
- Images of inkwells and inkhorns from Medieval & Renaissance Material Culture
- Images of scribes at work, including writing tools, from Medieval & Renaissance Material Culture
- “Scribe Tools Page” from Randy Asplund